Note: I originally wrote my course to recommend LastPass. However, they have since started charging to be able to use it on both mobile and desktop devices, forcing you to pick only one. I consider this unacceptable and no longer recommend it as a password manager to anyone, but have archived the post here in case you still want to use it.
You’ll need to carve off a big chunk of focused time for this lesson. Depending on how many accounts you have it could take a whole evening. But it’s like ripping off a bandaid; once it’s done it’s done forever. No spring cleaning on this one.
I recommend doing this one-time setup on a laptop, not a phone, as it would be significantly harder without a full keyboard and larger screen.
LastPass — Password Manager of Choice
This lesson will focus on the password manager LastPass.
It offers the widest range of features for free, is easy to use, and has trusted security so is my go-to when getting people started. What I mean by trusted security is that although LastPass stores your garbled up passwords in their cloud, they NEVER need or see your master password. This means your passwords will not be compromised even if they have a security breach and hackers get all the password vaults. The side-effect is that if you ever forget your master password, you will have to manually reset ALL of your passwords, so DON’T FORGET IT! See more details on how this works for LastPass here.
For the full user guide of LastPass, click here. My lesson below builds off components of that guide for the purposes of getting you set up quickly. Much greater detail can be found in the guide itself if you get stuck with anything.
I do NOT have any relationship with LastPass.One of the main reasons I picked LastPass was it’s ease of use. But feel free to check out other popular password managers, like DashLane & 1Password. Just make sure you understand the pricing model and that it has trusted security (namely they never require you to send them your master password).
Getting Set Up
LastPass setup is easy, just go to their website and click the ‘Get LastPass Free’ button at the top right. This will guide you through installing LastPass into your browser.

After the extension is installed, you will be asked to set up an account. The password to this account is your master password, so remember to make it crazy strong!! If someone is helping you with this lesson, you should change your master password once it’s all done. You should be the only person that knows your master password, even loved ones don’t count.
If you plan to fully complete this lesson right now, you may want to make your master password shorter for now, get set up, and then make it strong. But DON’T leave it weak!!! DO THIS AT YOUR OWN RISK!!
Now pick your master password, and log into LastPass like below:
Saving Your First Password to the Vault
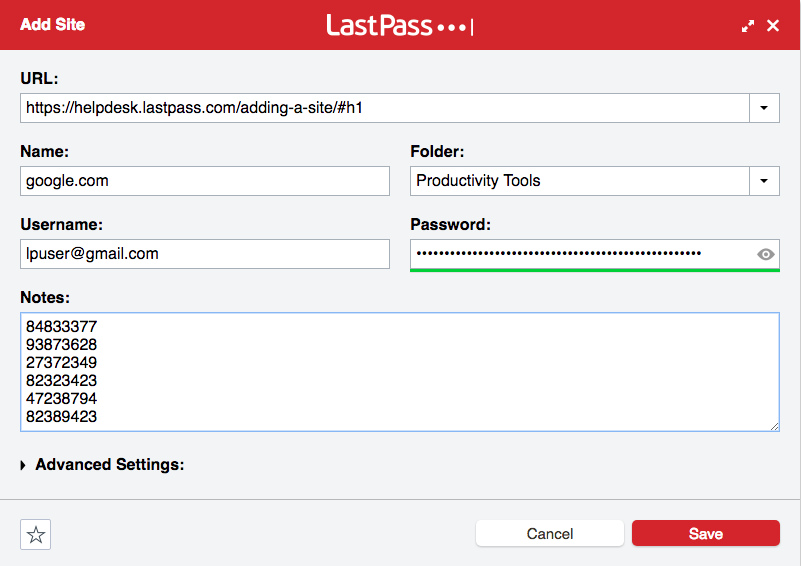
Now that you’re all set up, just pick any account you already have and go to the login page. Fill in your username and password. Now you can click the LastPass icon in the field, or else when you sign in LastPass will pop up and ask if you want to save the password.
Generate a Stronger Password
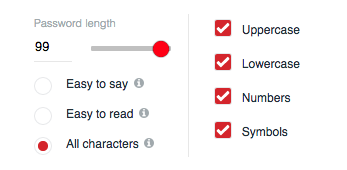
Now that you’re logged into that account, go and change the password. On the change password page, instead of thinking of a new password, click the LastPass icon in the password field and use it to ‘Generate a new password’
I recommend cranking the ‘password length’ all the way to the top end, and keeping all the advanced options checked. Some sites have ‘maximum length’ passwords (shame on them!) and restrict special characters, so in these cases you’ll just have to change the settings to match that site.
2-factor & Backup Codes
Since you’re in your accounts anyways, turn on 2-factor and generate backup codes (method is different for every account, and not available always). You can ‘edit’ the site and copy your backup codes into the ‘notes’ section of the account. Remember that if you ever have to use them you should erase them here to avoid confusion later.
Rip that Bandaid Off!
This is where we start the real big task. You now need to find ALL your accounts, and use LastPass to generate new passwords, which will be stored in your password vault. It can be really daunting to try to remember all of the accounts you have online, so here are some tricks:
- look in the Keychain app on your Mac: this app collects many of the username and passwords you use on your laptop
- browser saved passwords: many internet browsers save your passwords (links for Chrome, Safari, Firefox)
- search your email: search for emails with a subject with ‘Welcome’ in them, or search the word ‘password’ in your email, which will give you a pretty good list of many of the sites you’ve signed up for
If you’ve forgotten any passwords, that’s ok, you’ll just have to request a password reset.
For each account, rinse and repeat the following:
- Log in to each account and add it to LastPass
- Update each password with a strong, generated one
(the only exception is your master recovery email, which you should leave as the one you made in Lesson 1, so that you can recover your LastPass if you ever lose your master password) - Turn on 2-factor authentication (if available)
- Copy your backup codes into the ‘notes’ of the account in LastPass
(four hours later) Phew!!! That wasn’t too bad was it?
Welcome to a New and Better World
Now whenever you go to a site, if you’re logged into LastPass, your info will be automatically entered. Nice! If you want to go to a site, instead of typing it into your browser, search it in LastPass, click it, and it will navigate to the site and log you in. Sweet! Whenever you sign up for a new site, just use ‘Generate a Password’ and start from day one with a strong password. Awesome!
If a site doesn’t auto-enter for whatever reason, you can click LastPass, find it, and copy/paste the information into the login page. It also just might be that the site didn’t save enough information, so you can go into LastPass and edit the entry.
Using LastPass on Mobile Devices
Now that you’ve got LastPass set up on your laptop, download the LastPass app on your mobile devices. Download the app, and just log in with the same master password. Everything will then sync, that easy.
Since LastPass work slightly differently on each device, I recommend skimming their guides for Android/iOS/Windows.
Security Clean Up
Remember when we used the list of saved passwords in Chrome or another browser to find out what accounts we had? That’s a REALLY BAD place to store passwords. So let’s go back in there, and turn off the feature that even offers to save passwords (we’re better than that now). Also, delete all the ones it’s saved from our old life pre-LastPass.
Bonus Features: Multi-Factor, Secure Notes, Auto-Fill, Sharing
LastPass has plenty of bonus features you may be interested in:
- Multi-Factor: Your LastPass vault itself can have 2-factor, and since this is your most important account out there, I recommend it. BEWARE: If you do this, make sure the ‘recovery email’ account does not have a LastPass generated password. If you ever lose your 2-factor device, you will need to know the password to that account to regain access to LastPass and all your passwords. This is why I got you to set up a strong recovery email password manually in Lesson 1.
- Secure Notes: You can use LastPass to store other sensitive info besides passwords (scans of IDs, passports, pin codes, or even just notes you want secured). Just create a secure note, and upload the information. Just remember to delete the sensitive info from where it was made (like in the photo roll of your phone) or someone can get it that way.
- Auto-Fill Forms: A more secure way of doing what a lot of browsers do, you can use LastPass to remember credit card information, addresses and other form information to auto-fill it when you need it online.
- Sharing [Paid Feature Only]: Any two LastPass premium users can share individual passwords with each other. Useful for work situations and sharing common account information, or securely sharing information like a passport.
- Families [Paid Feature Only]: LastPass and others offer a paid ‘Families’ tier ($4/month for LastPass). Now that you’ve gone through the setup, you could use this as a way to promote safety in your entire family. Maybe they’ll even pay for it in return for helping them get set up ;). Note that you can achieve mostly the same experience by setting up individual accounts for each family member, you just miss out on unlocking each other’s accounts and sharing passwords.
Now that we’re at the end, make your master password strong (if you had made a weak one to get through this. Also, if you have a security deposit box or a safe, it may be a place to store a written version of your master password if you feel you may ever forget it.
Back to Lesson 3
Back to the Lesson Plan